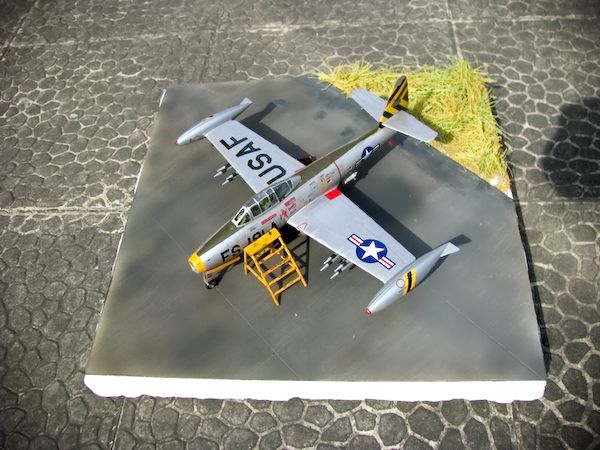
First time doing military aircraft, with a help from my friend to choose which one should I pick for the first kit, the choice was this. Academy F-84E/G Thunderjet. Actually when still at Junior High School, I'm very fond of military vehicle (tank, aircraft, ship, etc). I played a lot of war games (from PTO, CnC, Naval Warfare, etc).
I choose this kit because:
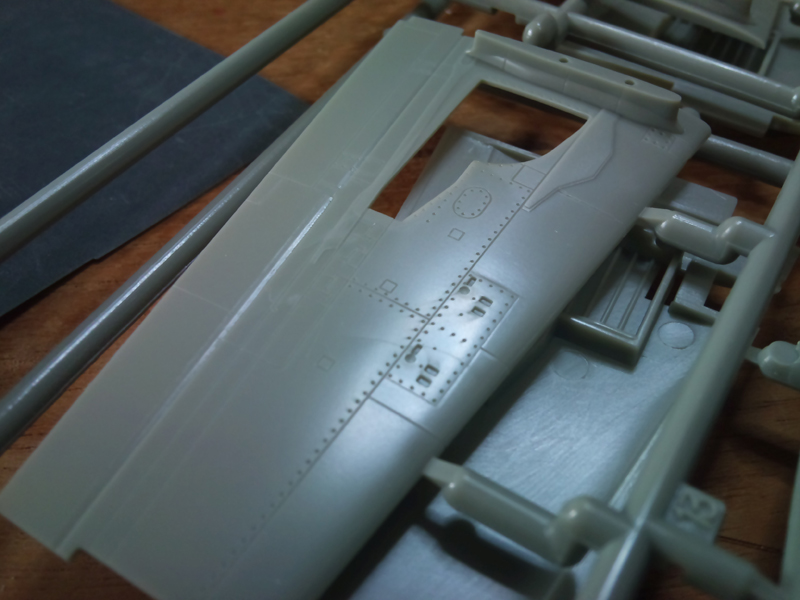
as we can see in the pic,
1. Fully engraved panel lines & rivet details (rivet details is a must for military plane to look more realistic)
2. Highly detailed cockpit interior & landing gear bay
Inside the box:
4 runner for the plane, 1 clear runner for cockpit, 1 runner for stand base which I didn't use. and 1 sheet of water decal.
we can see the rivet detail and the panel lines here
The tools that I used for early snap fit:
Modeller nipper, Scissor, Masking tape, Tamiya cement extra thin, Tweezer, Modeller knife, sand paper, and also super glue (don't forget about ballast, I use ballast for fishing)
Cockpit fitting trial, seems ok for me. The difference between building a gunpla and airplane model kit is we should check it first if it's snap or not, also we must do the cockpit first, interior before assembly the fuselage. The main reason for this because we need to glue them. While in gunpla we can disassemble the kit to paint them part by part.
Start to painting the cockpit, I used Mr Color for this. I airbrushed the cockpit and the seat using Olive darb for seat, Cockpit color for the cockpit, and flat black for the panel. Hand painted the panel detail using Tamiya enamel Red and White.
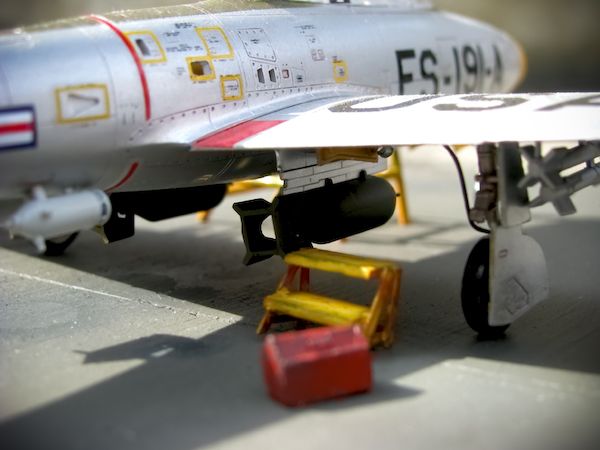
Fitting test, don't forget to paint the inner part too (inner landing gear, after burner, etc), also don't forget to cement them and leave until they dry.
looks fine..
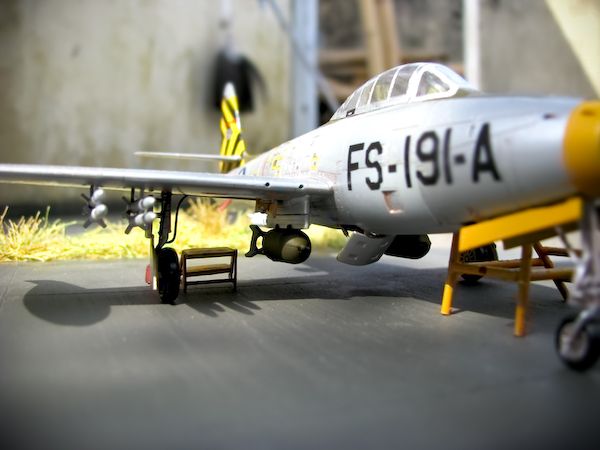
Dun't forget to mask them when painting the body, the hardest part of building aircraft is masking :(
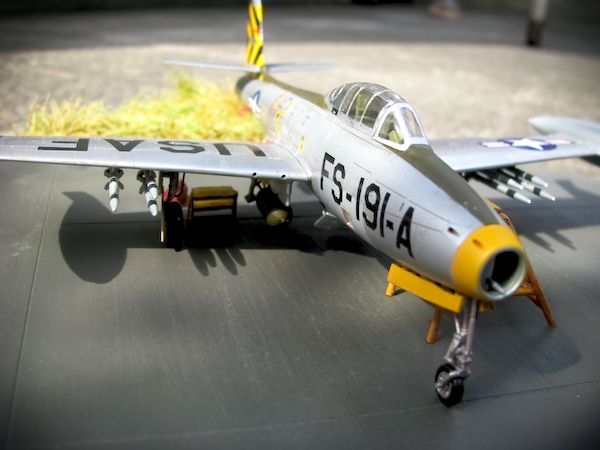
also little drilling in the progress. Painted the wings using Mr Color Bright Silver and Sandy yellow
Mr Color Orange yellow for nose, Bright silver for the body and Olive darb for the upper body. Adding some cable for detailing at the landing gear.
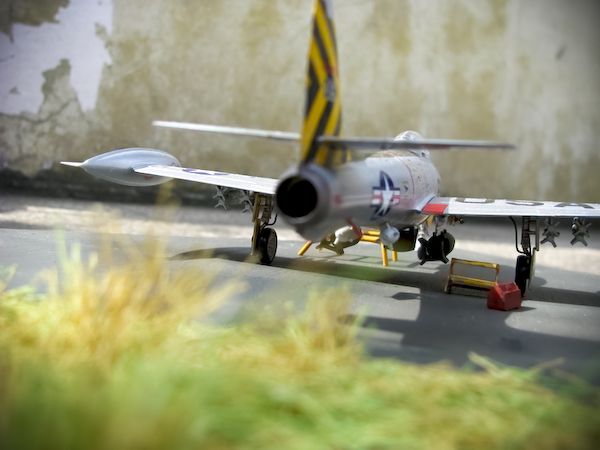
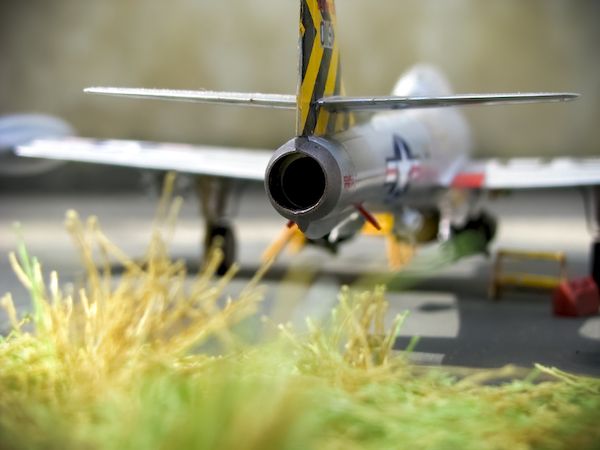
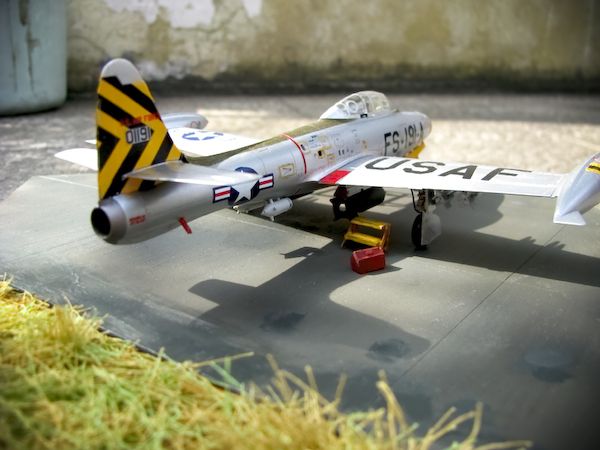
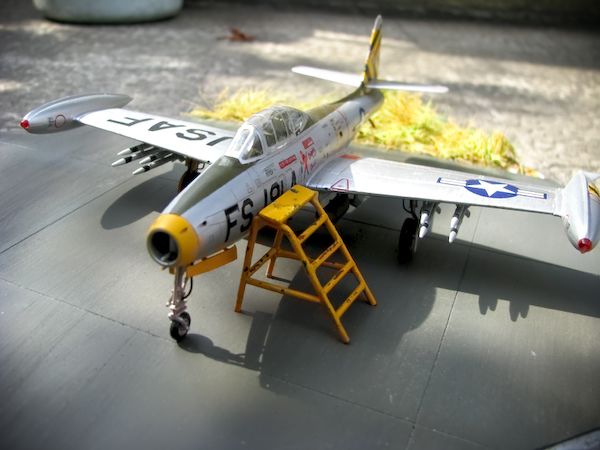
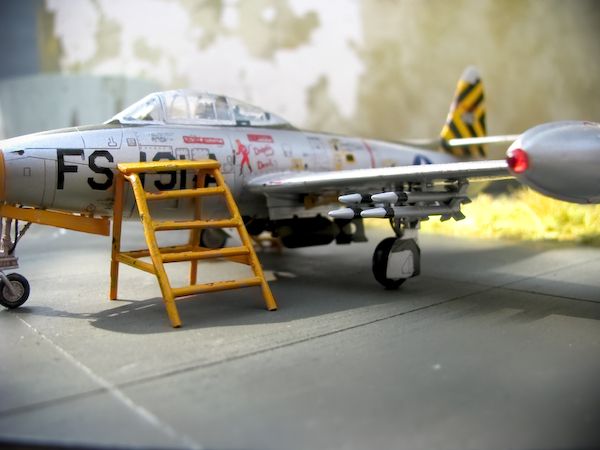
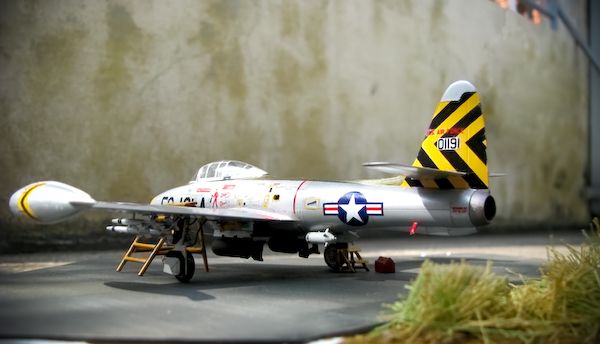
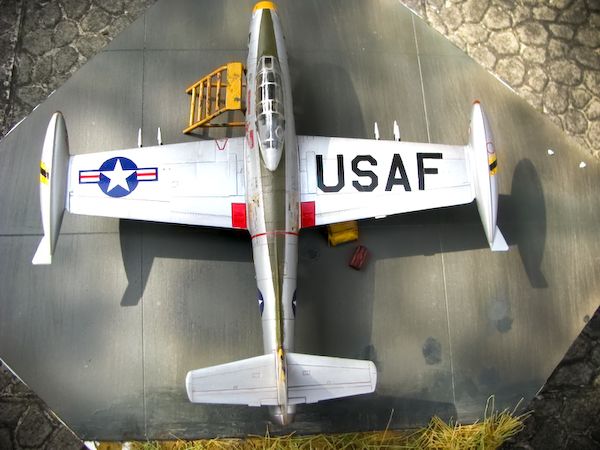
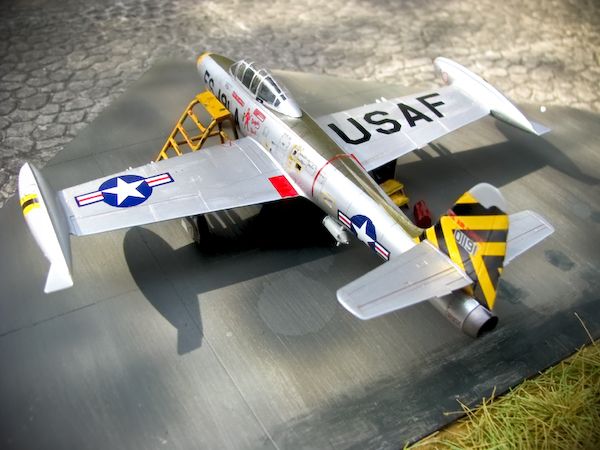
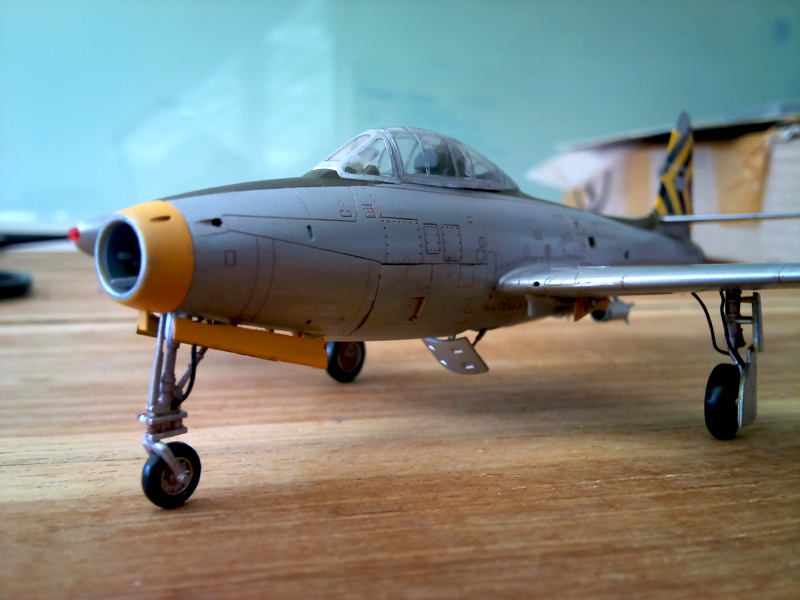
And at last my first military kit is finished.. Will post more about the photo in the next post.